Skip to content
George here talking about how to build a campervan from start to finish
How to Build a Campervan: Start to Finish DIY Off-grid Conversion
Table Of Contents
Intro
In this post, I’ve gathered up all my research on how to build a homemade campervan.
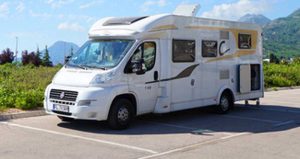
I’ve recently sold my Hymer B544, but before rushing out to buy another campervan, I’m spending 365 days viewing and filming 365 different campervans and motorhomes. Yes, you’re right. That is a bit bonkers, but I wanted a challenge, and I figured that YOU would benefit from my 365-day search.
I’m also considering getting a van custom-built by a local guy, or going the full hog and doing the custom-build myself…which is the reason for this post.
I’ve put the £17,000 from the sale of my Hymer (and £3,000 that was sitting in my savings account) into the stock market using the Freetrade App. To my surprise, I made a little over £1000 in my first two weeks by investing in a safe ESG fund (it went up 5.4%).
Hey, I’m fully aware I might lose all of that and more, but I figure it’s worth the risk considering the money in my bank would reduce in value 2% by the end of the 365 days (due to inflation).
If you’ve ever had a hankering to invest in the stock market, it’s now super-duper easy. Click here to get started with a free share worth £3-£200. That link is my Freetrade referral URL. If you join Freetrade you’ll get a free stock, and so will I.
10 reasons to convert a van:
Building your dream campervan is really fun!
You get great DIY skills that will last a lifetime.
It allows you to travel to amazing places.
And meet interesting people.
It kickstarts adventure and gets you into the outdoors.
It unleashes your inner creative – your campervan is totally custom!
Campervans are environmentally friendly – reduce those airmiles!
They’re economical too. It’s free accommodation!
Your friends will be super jealous of your build.
Lifestyle design – Take the first step in designing the kind of life you want to live.
Step 1: Plan For The Van
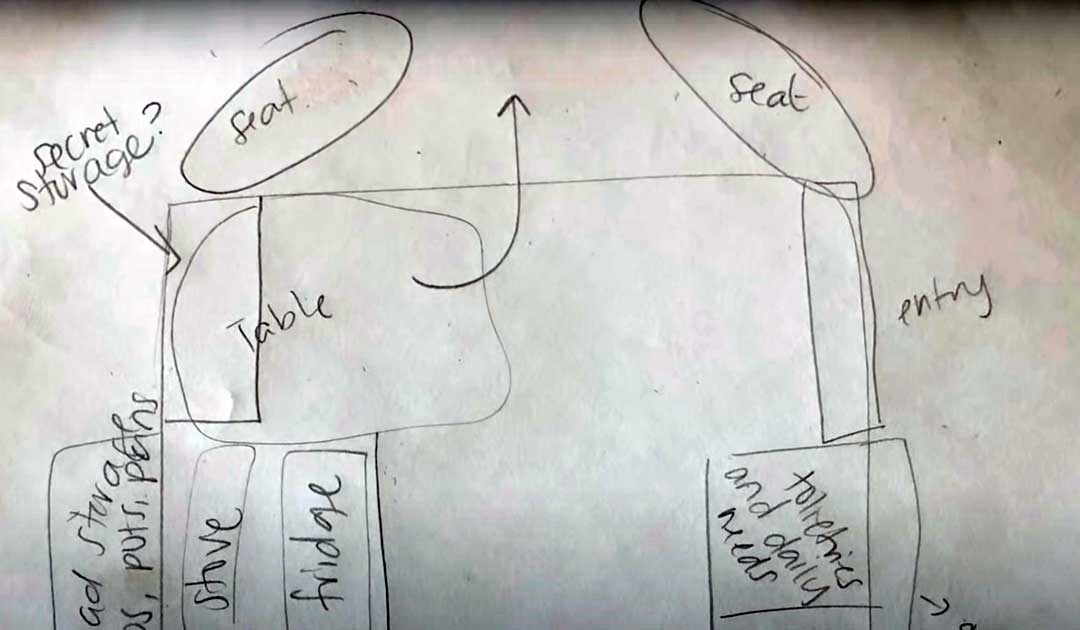

Before purchasing the van, it’s worth planning your ideal layout (though, you can get the van first, then create the plan). Always start with the biggest dimensions and demands.
In this example of a DIY campervan build, the main demand was storing two E-Bikes without taking them apart. This dictates the entire layout. The E-Bikes are quite high so the plan would include how to make them as low as possible.

If you plan to live full-time inside, you will need enough space in the living area to move around your partner or you’ll go a bit crazy.
Step 2: Strip The Van

Strip the van. Take everything out of the van that doesn’t have to be in there. You’ll probably need to get rid of everything (dividers, seats, panels, and covers).
Step 3: Do Mechanical Repairs
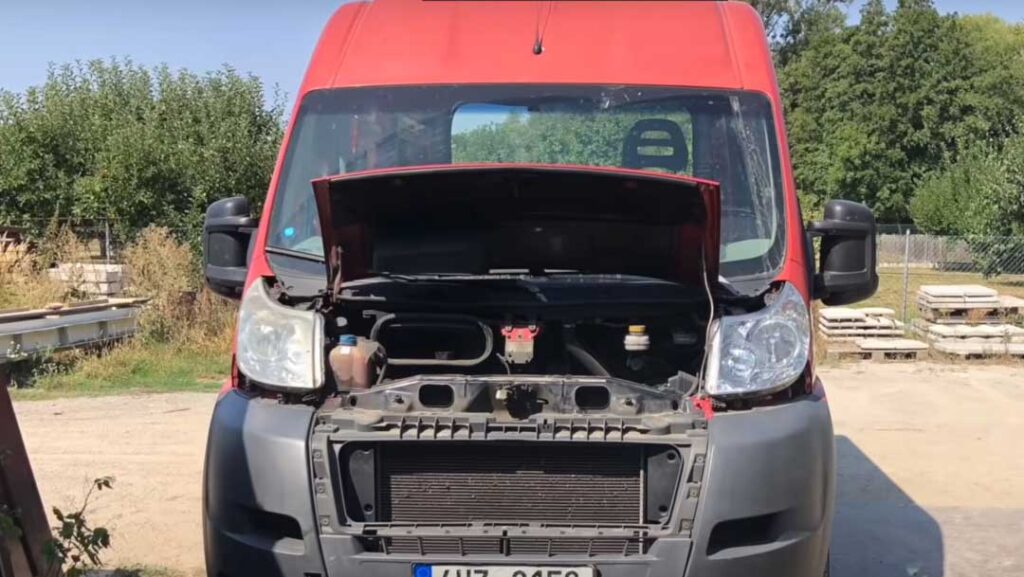
Do all the mechanical repairs. You obviously want a fully functional, trustworthy vehicle, so make sure it is at the very beginning of the DIY off-grid conversion. For some vans, it might just be an oil change if you’re lucky. Though, you may have to change the timing belt, cam belt, tyres, etc.
If you have a spare £200 and aren’t a mechanic, it’s worth getting an AA vehicle inspection so you learn about hidden problems before you buy. It will give you tremendous peace of mind, especially if you plan to live in it full-time. The AA will do a 206-point check for vehicles of any age, even on a 30-year-old van, for £200 (or a 155-point check for £150). They’ll provide you with a full photographic report. It’s a detailed physical inspection, including mechanical parts, bodywork checks for accident damage, and a 10-mile road test.
The good news is that the seller doesn’t get access to the report. Though, I recommend you ask the AA person not to give any information to the seller. You don’t have to be on location with the AA person, which is very handy if the van is located hundreds of miles away.
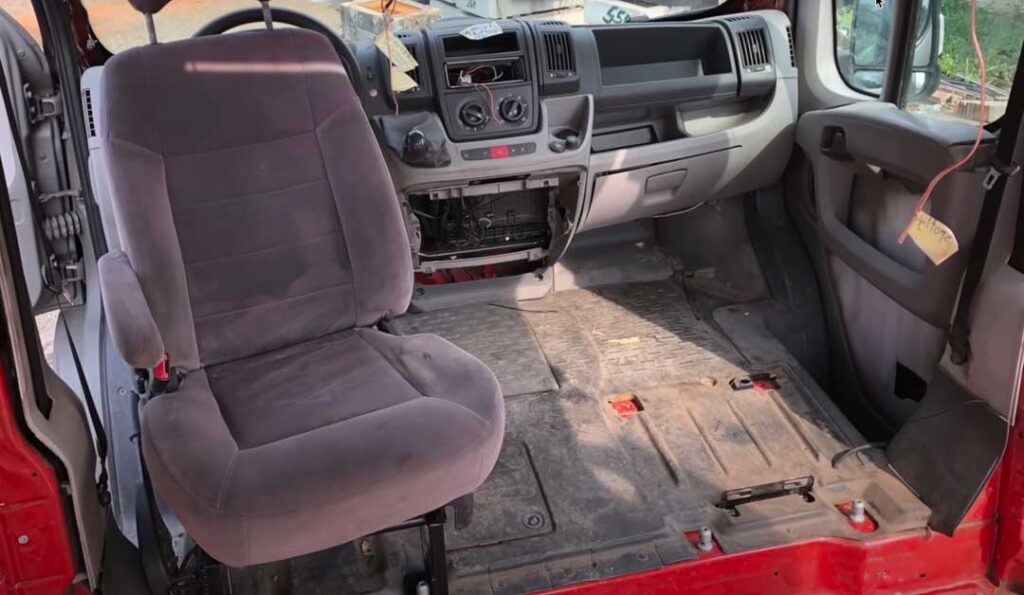
Step 4: Swivel Captain Chairs
You’ll definitely want swivel (captain) chairs because they will open up the van a huge amount when you’re not driving. The swivel mechanism is expensive so if you’re up for a welding challenge you might consider making them yourself by getting the swivels from junkyard cars.
You might also be able to source the two swivel chairs from a junkyard or pay £350 from someone on eBay who has already found them on a Ford Galaxy.
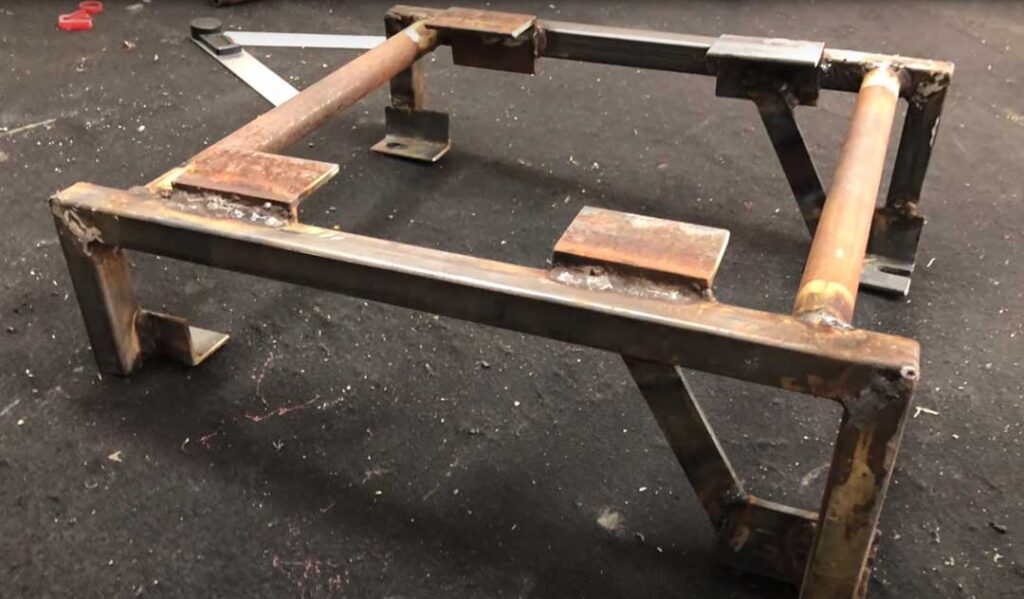
See how much the swivel chairs open up the van living space and also provide two extra seats for the living quarters.
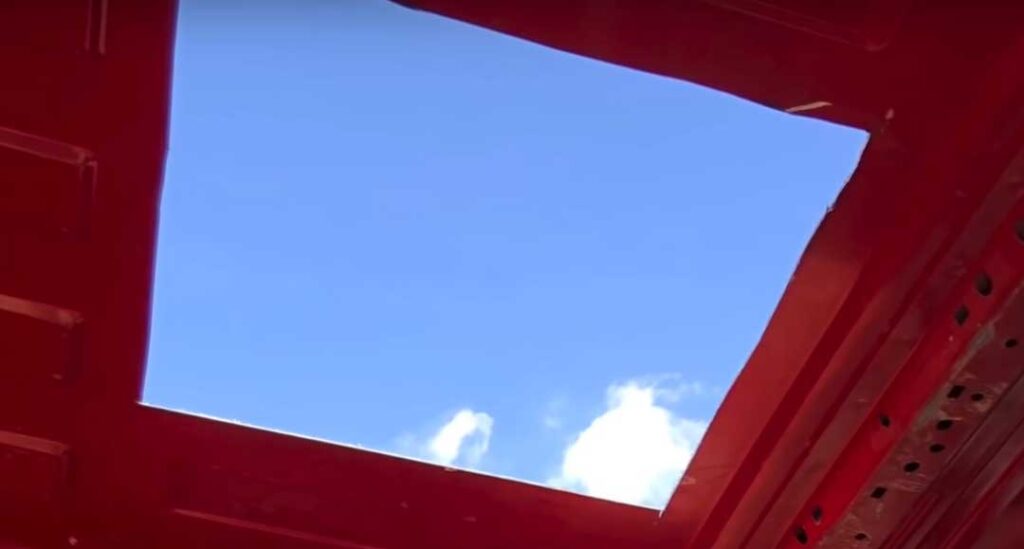
Step 5: Side & Roof Windows
Decide where you want the windows by marking them out.
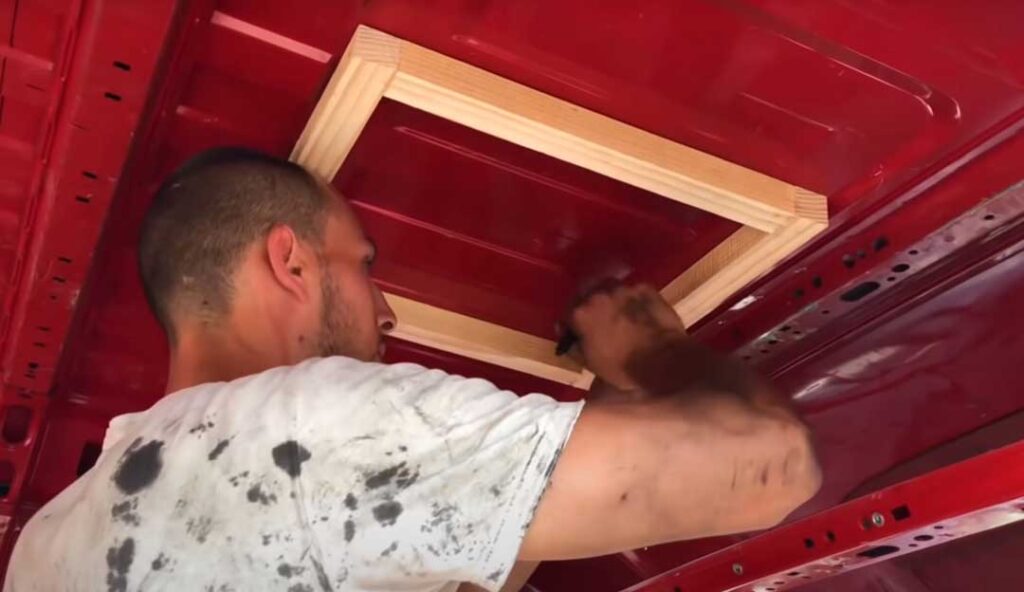
And then cut the holes for them.
Give a little whoop of joy when you see the blue sky.
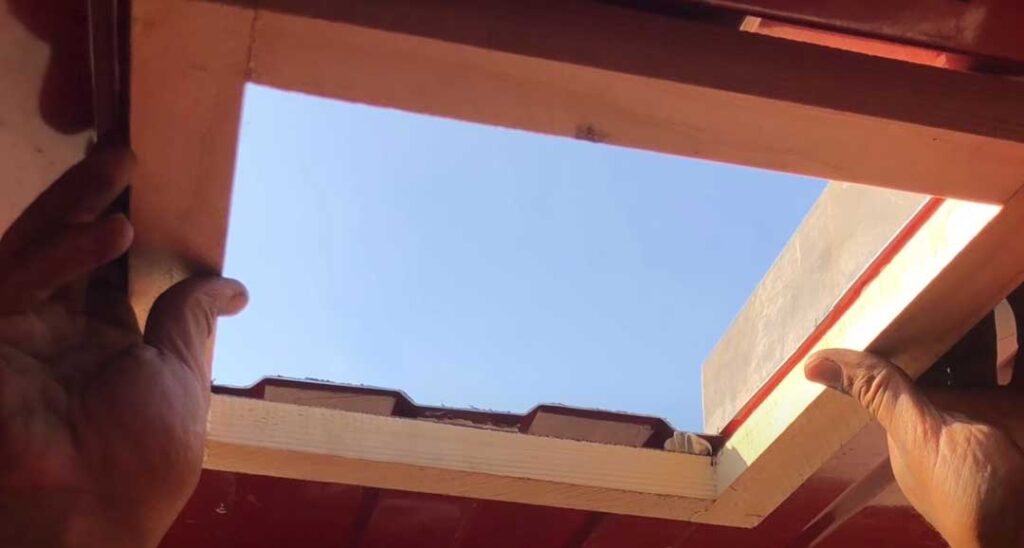
Next, make a simple wooden frame to even up the thickness of the entire roof. For a proper fit for the roof window, it needs solid support. Make sure the top part of the roof or side window is properly sealed.
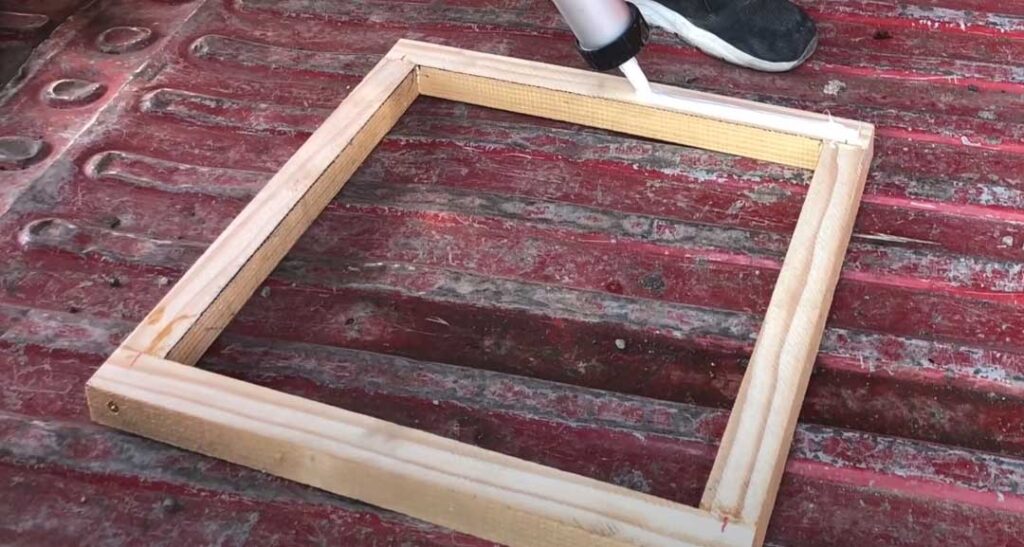
You need some good glue that is resilient to wet weather conditions.
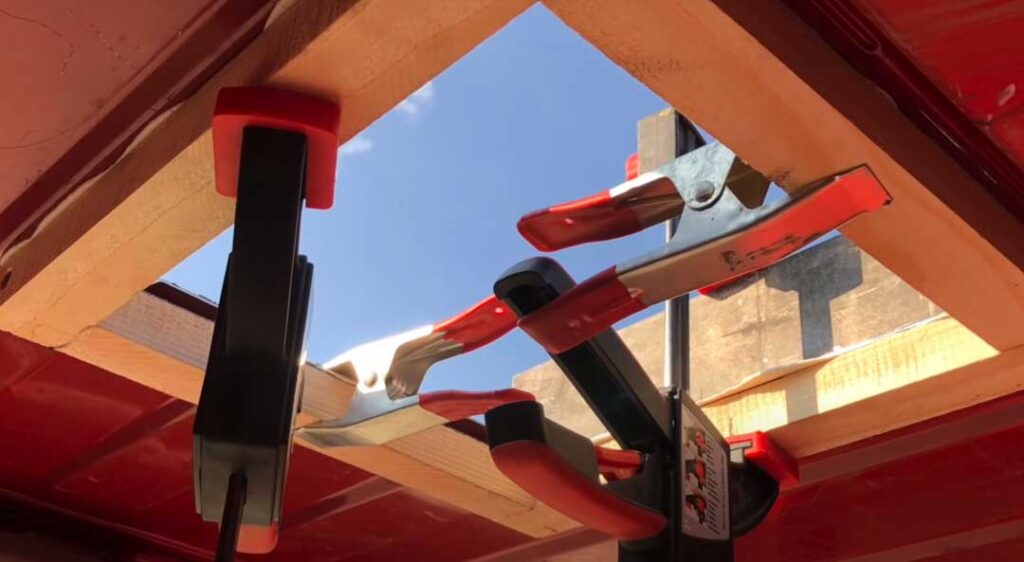
And a good clamp or two always comes in handy!
Now it’s time to cover up that gaping hole with a roof light.
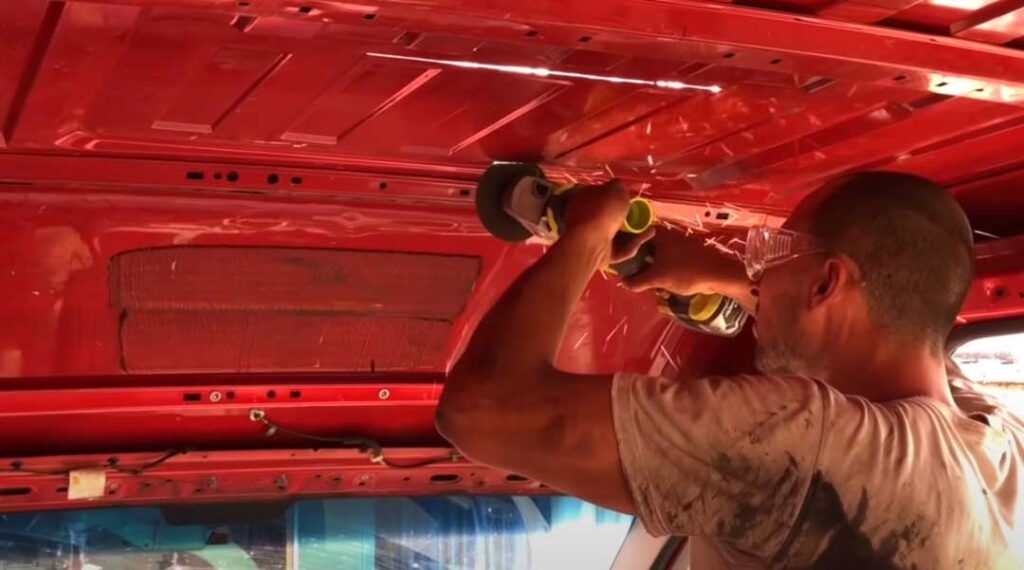
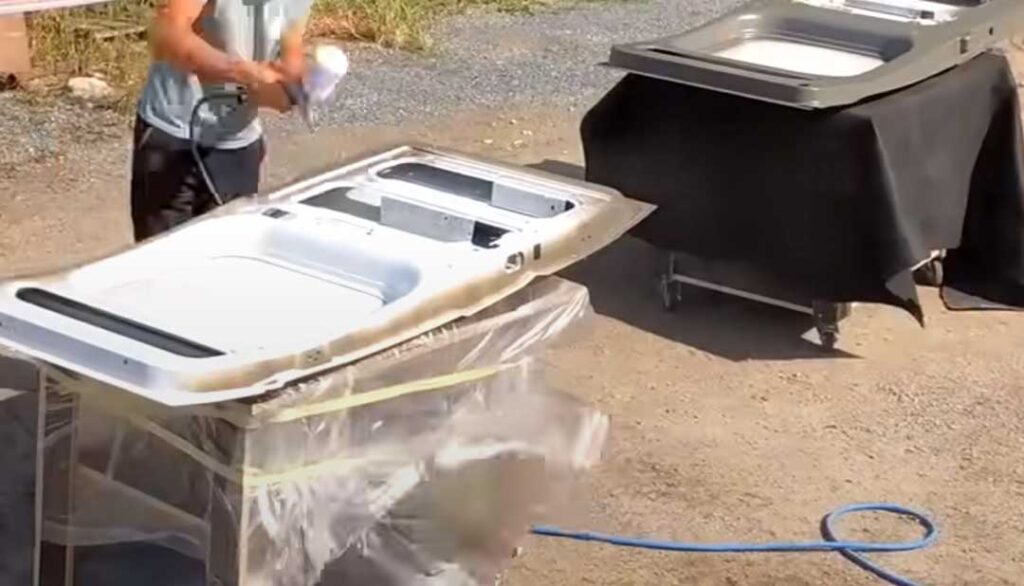
Step 6: Paint Job

Most people, even non-DIYers, are capable of doing the paint job! Polish off any imperfections, and with fine sandpaper sand down any rust and minor bumps. Once that’s done, wash and degrease the entire surface of the van.
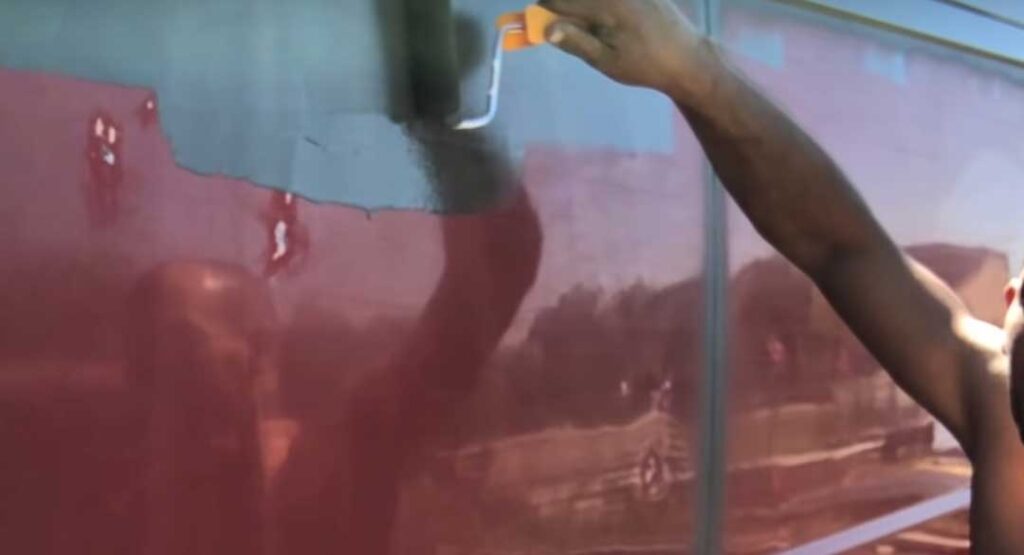
Rolling the paint on the van is a cheap and quick way of doing the paint job.
Spray paint all the curves first so you don’t see strokes from the brush. After that add two coats of paint. If the van gets scratched in the future, it will only cost you a few pounds to paint it over.
Step 7: Campervan Water Tanks
There are plenty of pre-made campervan water tanks that you can choose from. Ideally, put them underneath the van to save space.
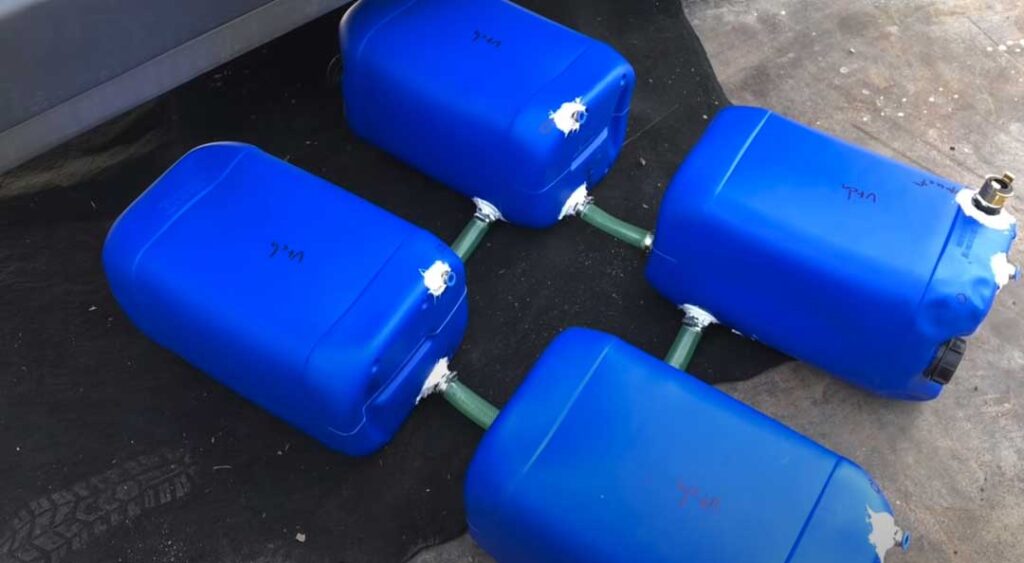
If you’re on a tight budget you can build your own tanks out of barrels. It’s more work, but fun if you like challenging projects.
Connect four 25-litre barrels together to create a 100-litre freshwater tank.
Connect another two together for your grey-water tank.
The barrels should fit perfectly under the van. Weld the supporting frames for the tanks to the board. The frames are covered, protected and pushed hard against the van from the bottom.
Step 8: Solar Panels
Fitting solar panels is pretty easy. You can buy solar panel brackets to attach to the van.
Step 9: Reversing Camera
Fitting a reversing camera is easy. Buy a reversing camera kit on Amazon. Put all wires in protective hoses so you don’t cut through them by accident in the future. Mark the wire route out with a marker pen on the ban.
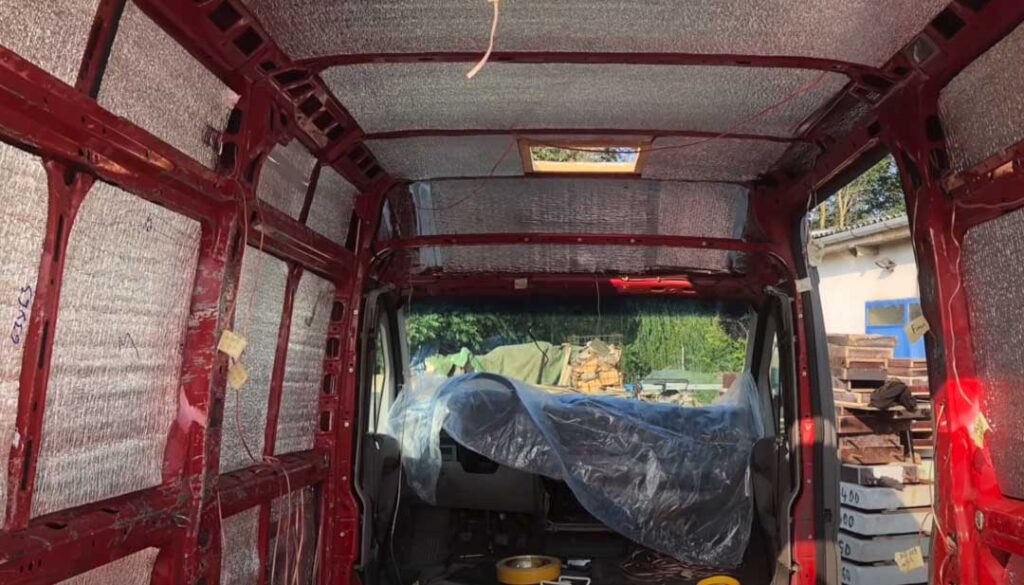
Step 10: Insulation
There are many ways to insulate a campervan. In this build, a silver, double layer, 18mm insulation was used. You can also use celotex.
Step 11: Flooring
Lift and even the flooring and use insulation (e.g. celotex). For the flooring use plywood.
Step 12: Panels
The next job is the panelling to cover all the insulation up. It’s best to watch the video for this one.
Step 13: Furniture Build
For the furniture, different people use different materials. Most DIYers use lightened plywood. It’s sold, doesn’t warp with humidity and is lightweight. If you are on a budget you can also use chipboard.
Van Tools, Fixtures, Appliances For YOUR Build


When researching “how to convert a van“, I made a list of all the tools, fixtures and appliances I might need. To save you time, I’ve included that list below for you.
To save money, I recommend borrowing tools from friends and family.
* The links below are affiliate, meaning I make a small commission from the recommendation.
Freetrade App
Getting the Freetrade app on your phone is the first thing you should do before starting a van conversion. Creating passive income streams allowed me and my partner to full-time in our campervan for 18-months without once ever worrying about money.
It’s not rocket science. Instead of spending £4 on a pint at your local pub, get out your phone and invest that £4 in a stock or index fund. Each time you invest, you are creating more time in the future for van living (instead of working at a dead-end job).
You can get a free stock when you click here and sign up using my Freetrade referral link.
Pssst, for full transparency, I get a free stock as well.
e-Bike
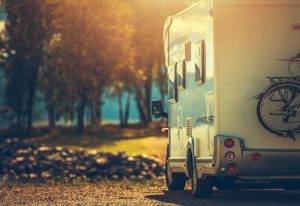
Most campervaners have E-Bikes because they open up a whole new world of adventure.
E-Bike: https://amzn.to/3cuU51N
Evieun EVSE Level 2 EV Charger: https://amzn.to/3CChVDh
Van Conversion Tools
Here’s a complete rundown of all the tools needed for your campervan conversion.
Part | Description | UK | |
|---|---|---|---|
Aluminium Foil Tape | The aluminium foil backing will create an air and watertight seal to protect against water leakages. | ||
Basic Tool Kit | Contains two dozen tools that you need throughout a van build. | ||
Bosch 18v Circ Saw | Cut up to 50 chipboards (900 x 19 mm) to length with only one battery charge. | ||
Bosch professional 18v | Cordless impact driver. | ||
Bosch Router | World’s first professional cordless edge router – Newly shaped for perfect control. | ||
Expanding Foam Gun | Ideal for insulating those hard-to-reach spots. | ||
Foil Wrap Vapour Barrier | Vapour Barrier and Waterproof Thermal Insulation Aluminium Foil Membrane - Suitable for use in Walls, Floors and Roof. | ||
Hammerite White Metal Paint | Hammerite Direct to Rust Metal Paint - Smooth White Finish 250ML. | ||
Kreg K5 Pocket Hole Jig | Front-mounted clamp handle for easy clamping. | ||
Quick Grip Clamps | Essential tool for throughout the build (get at least 2, preferably 4). | ||
Mask respirator | Safety is priority number one! | ||
Military Vehicle Paint | Single pack solvent-based coating designed for use as a refinishing paint for military vehicles. | ||
Nibbler Cutter Drill | If you have tried to cut out panel for window with jigsaw and bounced all the way round then had to grind out all the rough edges, try one of these because they cut smooth with little vibration. | ||
Osmo wood wax finish intensive in white matt | Semi-gloss, opaque wood finish which, in only two coats, achieves a uniform, eggshell-like, durable surface maintaining the character of the wood. | ||
Osmo wood wax finish transparent in walnut | Transparent, satin-matt, for interior use. Especially recommended for furniture and flooring. Durable, water-repellent and dirt-resistant. | ||
Red oxide rust treatment | Primer should form an essential part of painting your van. Without it, the topcoat is unlikely to give the finish that you want. | ||
Paint roller | Do you want painting to be faster and easier? | ||
Paint sprayer | It is powerful, lightweight and has a range of useful features. | ||
Safety glasses | Essential when making cuts to metal. | ||
Saw horses | To work from if you don't have a garage or bench space. | ||
Self-centring drill bits | Easy to use and install, change bits fast which one-handed load and release. | ||
Soft cell foam | Window Insulation Soundproofing Adhesive Foam Seal Strip Closed Cell Foam Tape. With permanent acrylic adhesive for long-lasting stickiness. Great weather stripping for doors and windows. | ||
Sound deadening | Simply cut, peel & stick on the interior sheet metal of your van to reduce unwanted vibrations & structural noise. | ||
Stanley knife | All metal construction that is solid, reliable and long lasting. | ||
Stanley knife hook blades | Excellent pack of replacement blades for a Stanley. | ||
Work gloves | Protect your hands! |
Van Conversion Fixtures & Appliances
Here’s a complete rundown of useful fixtures and appliances for your campervan conversion.
12V Diesel heater: https://amzn.to/3x4OtVp
Brass tap/faucet: https://amzn.to/3cEVpPI
Camper carpet (4-way stretch): https://amzn.to/3nI5YYg
Campervan thermal blinds: https://amzn.to/3nVeLGN
Camping toaster: https://amzn.to/30R12Y4
Copper bulkhead lights: https://amzn.to/3x9EjCV
Deep cycle battery: https://amzn.to/3DGicX5
Diesel heater kit: https://amzn.to/3cE4ubq
Dometic Fridge Freezer: https://amzn.to/3r1c9ZI
Dometic Hob: https://amzn.to/30IWVhn
Double seat swivel: https://amzn.to/3FG1NTk
Earplugs (sleeping next to roads): https://amzn.to/3CM1EMc
Extension lead caravan hook up adaptor: https://amzn.to/3CANCN7
Fiamma rooflight vent: https://amzn.to/3qZXbDd
Furniture latch catch: https://amzn.to/30GqAYa
Fuse box: https://amzn.to/3CFp0mu
Iboost Free Internet: iBoost D8 Directional System
Killswitch: https://amzn.to/3CGmTPi
Linear actuators for the bed lift: https://amzn.to/3FzO0O4
Magnetic phone holder: https://amzn.to/3DBmuyR
Mains hook up kit: https://amzn.to/3HFF5MV
Memory foam mattress topper (small double): https://amzn.to/3l1rl5o
Multipurpose Insulation: https://amzn.to/3HCIPPb
NETGEAR 4G router with sim slot Unlocked: https://amzn.to/3l0HB6x
Mini first aid kit: https://amzn.to/3nP9lgs
Paper towel rack: https://amzn.to/3cybTsM
Portable camping chairs: https://amzn.to/3DPfLSa
Rechargeable reading lamp: https://amzn.to/3cvzzOe
Reversing camera: https://amzn.to/3oFIliw
Rhino roof rack: https://amzn.to/3DIzgMc
Spice rack: https://amzn.to/3CIYbxP
Spotlight: https://amzn.to/3nA58wL
Sterling B2B charger: https://amzn.to/2ZaTkHV
SuperBatt ultra deep cycle battery: https://amzn.to/3cEWsiC
Switch panel: https://amzn.to/3FwI6Nx
Solar Panel Fixtures & Appliances
Here’s a complete rundown of everything you need for solar in your campervan conversion.
Solar panels 150W: https://amzn.to/3qTd9Po
Solar panel brackets for van roof: https://amzn.to/3HHGmCO
Solar controller MPPT: https://amzn.to/3cMSSTH
Campervan Adhesive & Sealant: https://amzn.to/3czNgMf
Corner mounts: https://amzn.to/3HIMvyP
Crimp connectors: https://amzn.to/3czNpiL
Crimping tool: https://amzn.to/3xfgXM3
Fuses: https://amzn.to/3nCzm2m
Inverter 2000W: https://amzn.to/3nG3hXt
Sargent unit: https://amzn.to/3nDzuys
Victron battery monitor: https://amzn.to/3CGnyAg
Waterproof double cable entry gland: https://amzn.to/3r05eA4
Floor Fixtures & Appliances
Here’s a complete rundown of everything you need for flooring in your campervan conversion.
25mm Celotex (insulation foil): https://amzn.to/3czT5td
4.8mm x 50mm self-drilling pan head Screws: https://amzn.to/3CHaQl1
15mm furniture board: https://amzn.to/3xbOh6B
Adhesive glue spray: https://amzn.to/3xe9LQi
Aluminium foil adhesive insulation tape: https://amzn.to/3l0Ont8
Bubble foil insulation: https://amzn.to/3DN6UAf
Cladding: Wickes.co.uk
Cordless router: https://amzn.to/30JxPyV
Fibre blanket insulation: https://amzn.to/3DS3mwD
Freud circular saw blades: https://amzn.to/3xdEb5t
Insulation boards: https://amzn.to/3nMNKFa
PIR 50mm insulation board: https://amzn.to/3xerrvf
Recycled plastic insulation (fluffy stuff): https://amzn.to/30OlusL
Slot cutter router bit: https://amzn.to/3HMUqek
Thermo wrap: https://amzn.to/3nNvfk0
Water System Fixtures & Appliances
Here’s a complete rundown of everything you need in order to build a fully off-grid water system in your campervan conversion.
Collapsible washing up bowl: https://amzn.to/3DJB7jP
Fiamma water expansion tank acumalator: https://amzn.to/3r0InUQ
Fiamma water tank 70 lt: https://amzn.to/3CGjwb6
Hose (food grade): https://amzn.to/32jPqh5
Indoor shower tray: https://amzn.to/3I14SPM
Mixer tape: https://amzn.to/31225oB
Outdoor shower: https://amzn.to/3pg8hBN
Shurflo water pump: https://amzn.to/3DJAl6j
Sink kit: https://amzn.to/3COzuQs
Sink tap (Smev): https://amzn.to/30MJaOz
Sink tap (comet): https://amzn.to/3xyao7L
Thetford porta potti: https://amzn.to/3FG85C3
Unisex potty urinals: https://amzn.to/3DGiNI9
Water heater: https://amzn.to/3cIFxM7
Water pump: https://amzn.to/3DNGrm4
Gas System Fixtures & Appliances
Here’s a complete rundown of everything you need in order to build a fully off-grid gas system in your campervan conversion. I’ve included all parts necessary to have hot water and heating no matter where you are in the world.
12V Diesel heater: https://amzn.to/3x4OtVp
Carbon monoxide detector: https://amzn.to/3HTYJVh
Dometic Fridge Freezer: https://amzn.to/3r1c9ZI
Dometic Hob: https://amzn.to/30IWVhn
Fire extinguisher: https://amzn.to/3DOGv5m
Gas detector: https://amzn.to/3DTiDh0
LGP refillable gas canister: GaslowDirect.com
Propane heating: PropexHeatSource.co.uk
Underslug gas tank: AutoGasShop.co.uk
Adhesive, Sealants & Finishes
Adhesive, sealant & filler: https://amzn.to/3xkgQz2
Dodo dead mat hex sound deadening: https://amzn.to/3CFrKQM
Double-sided flooring tape: https://amzn.to/3Fu8V50
OSMO wood finish: https://amzn.to/3nHg1wI
FAQs
Final Thoughts
Building your own campervan is a daunting task for even an experienced DIYer. If, however, you have “handy DIY friends“, tell them about your mad idea, and I’m sure one or two of them will love to help you with the build.
Don’t be put off by the Youtube videos showing the conversion of awe-inspiring vans. I found myself getting a bit depressed by them because they were all experienced, good-looking and creative craftsmen and women. I’m just an ordinary, bland-looking bloke with a few tools in his shed, and a desire to learn some new skills while building a home on wheels. And that’s okay.
After doing the research above (which I hope helped you as well), I felt that with the help of a DIY friend, and a year’s worth of patience, converting a van wasn’t beyond the realm of possibility. It almost certainly won’t look as good as the Youtube versions, but it will be my creation, and the skills gained will be useful for other creative projects in the future.
I also thought it would be nice to rent out the campervan to my friends and family for free (and rent it out the rest of the time on these campervan rental sites).
Thank You Coffee

Did you appreciate my blog post? If so, please send a “thank you” coffee to paypal.com/paypalme/georgeandrewwatts.